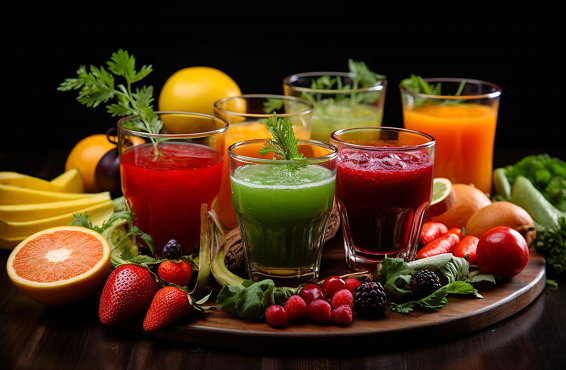
Juices
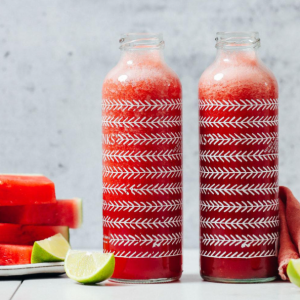
- Watermelon Juice
How to make watermelon juice FAST with just a watermelon and a blender! Options for add-ins and cocktail recipes included!
Make The Recipe ( Once we click this link-It should go into the recipe)
If you’ve ever wondered how to make watermelon juice, you’re not alone! We were surprised to discover just how simple it is while experimenting with a watermelon cocktail a few years ago.
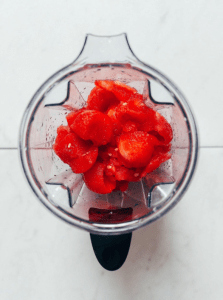
All it takes is scooping ripe, juicy watermelon into a blender, blending it up, and serving. That’s it! Of course, there are a few tips and tricks to perfecting the process, and we’re excited to share them with you in this post. Let’s dive in and show you how it’s done!

How to Make Watermelon Juice
It’s really as simple as adding to a blender and blending it up!
But there are a few tricks to learn to ensure success every time:
- Use ripe, juicy, sweet watermelon (this is key for best flavor!)
- Choose a seedless watermelon, or remove seeds before blending
- A high-speed blender is quickest and easiest (we don’t recommend a food processor)
- Straining is optional if you prefer a smoother juice; however, we don’t find it necessary
- Like cold juice? Scoop and refrigerate your watermelon BEFORE blending so it’s cool and refreshing and ready for serving right away
Health Benefits
- Have you ever thought about why watermelon feels so rejuvenating on a scorching summer day?
- One reason is that it’s made up of 92% water! Plus, it’s packed with potassium—an essential electrolyte often depleted through sweat.
- Watermelon is also a powerhouse of nutrients, offering a mix of antioxidants like lycopene, vitamin C, and beta-carotene, along with magnesium, and vitamins B1 and B6, among others!
Ways to Use Watermelon Juice
- Watermelon juice is an ideal thirst-quencher for sweltering days! If you don’t finish it immediately, you can refrigerate the leftovers for up to 2-3 days.
- Alternatively, pour it into ice cube trays and freeze. These flavorful cubes can be blended into smoothies, margaritas, or frozen cocktails. You can also drop them into sparkling water or tonics for a vibrant and refreshing twist!
We hope you LOVE this watermelon juice! It’s:
- Hydrating
- Naturally sweet
- Revitalizing
- Delightful
- & Perfectly versatile
If you give this recipe a try, we’d love to hear from you! Share your thoughts in the comments, rate it, and don’t forget to tag your photos with #luxhaba on Instagram. Cheers to good health and happy sipping!
Fresh Mint Tea (Hot or Iced!)
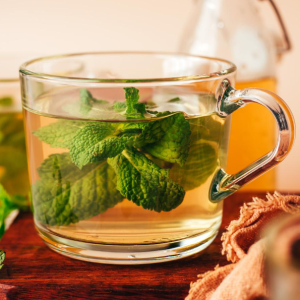
Aromatic homemade mint tea crafted with fresh mint leaves! Only 2 ingredients, 1 pot, and ready in just 7 minutes!
Make The Recipe
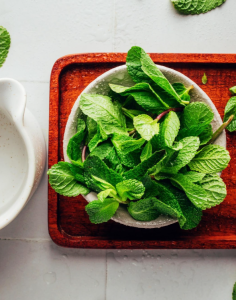
As spring arrives and your garden flourishes with fresh mint, this mint tea recipe will be your go-to! It’s incredibly aromatic, effortlessly simple, and a delightful way to showcase this vibrant herb. All you need are two ingredients: fresh mint and hot water — it couldn’t be more straightforward.
Savor it warm as a comforting drink on cooler days, or serve it over ice for a refreshing and cooling treat perfect for spring and summer! Let’s brew some tea!
Preparing Fresh Mint Tea
If you’re wondering, “Isn’t making mint tea as simple as combining fresh mint with boiling water?” not quite! When using fresh mint instead of dried, the flavor won’t be as strong with that method. Why? Drying herbs breaks down their cell walls, releasing more of the aromatic oils that infuse the water with flavor.
The Secret to More Flavorful Fresh Mint Tea
The key to enhancing the flavor? Break down the mint’s cell walls!
- We recommend using a mortar and pestle for this, but in a pinch, you can simply rub the leaves between your palms.
- Keep at it until the leaves shrink to about half their original size.
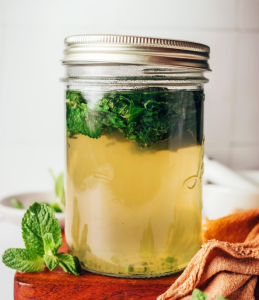
- Next, transfer the crushed mint to a jar, pour in boiling water, and cover it.
- Covering during steeping helps retain the aromatic oils, resulting in a more fragrant tea.
- Finally, strain through a fine mesh strainer and enjoy it either warm or over ice.
We hope you LOVE this mint tea! It’s:
- Refreshing
- Invigorating
- Cooling
- Soothing
- And incredibly simple to make!
It’s perfect for using up a surplus of fresh mint, cooling off on a hot day, or offering gentle support for digestion. Better yet, invite your herb-loving friends over for a tea party! Technically, it’s an herbal infusion or tisane party, but let’s admit, that doesn’t have quite the same ring to it!

Simple Green Juice Recipe + Juicing Tips
Our go-to green juice recipe made with just 7 ingredients! It’s refreshingly delicious, packed with nutrients, and so easy to make. Plus, we’re sharing juicing tips, favorite techniques, and top juicer recommendations!
- If you’re a fan of green juice but find store-bought options too pricey, this homemade recipe and guide are exactly what you need. We’ve been making juice for years and have fine-tuned this tangy-sweet green juice recipe along the way.
- Our favorite green juice is full of easy-to-absorb nutrients and works great for using up any leftover fruits and veggies from the week. Packed with potassium, folate, vitamins K and C, and more, it’s the perfect drink for boosting your body with powerful nourishment.
- And the best part? It’s ready in just 25 minutes with only 7 ingredients and a juicer. But don’t worry if you don’t have one, you can still make it without! Let’s get started!

How to Prepare Green Juice
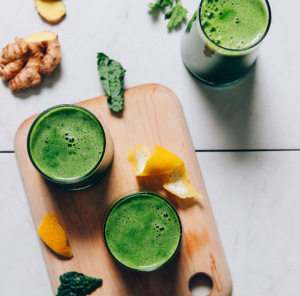
Our Green Juice Formula – We start with hydrating celery and cucumber as the base, then add nutrient-packed greens like parsley and kale for a vibrant green hue. Apple (or orange) brings a bit of sweetness, while ginger and lemon contribute a tangy punch and a boost for your immune system!
Wash, Peel, and Chop – According to our Hurom juicer’s guidelines, it’s best to chop the vegetables into pieces small enough to fit through the chute easily. They also suggest peeling citrus fruits, as their rind can be tough for the machine to process and may prevent it from extracting all the juice.
Juice! Switch on your juicer and feed all the ingredients through, using the tamper if necessary. We recommend starting with celery, followed by cucumber, herbs, and greens. Finish off with the ginger, apple, and lemon. The apple and lemon seem to give the juicer a final push, helping to extract any last bits of juice that might have gotten stuck.
Juicing Tips
Before you begin, invest in a high-quality juicer (see recommendations in the notes), or use our Juice Without a Juicer method. If you opt for a juicer, we suggest a slow masticating model (like the Hurom), as it preserves more nutrients than faster, centrifugal machines.
Whenever possible, choose organic produce. If organic options aren’t available, be sure to wash your fruits and vegetables thoroughly and peel the skin when you can.
Cut your produce into small, manageable pieces that fit easily into your juicer’s chute. Avoid rushing the process by overloading the chute, as this can strain the motor and potentially clog the machine.
For the best flavor and nutrient retention, enjoy your juice fresh or within 24 hours. Store any leftovers in a tightly sealed container in the fridge.
Don’t toss the leftover pulp! You can repurpose it in recipes like crackers, bread, and cakes (results will vary based on the type of pulp).
We hope you absolutely ENJOY this juice! It’s:
- Invigorating
- Tangy-sweet
- Packed with nutrients
- Adaptable
- Fast & simple
- And totally delicious!
Easy Homemade Strawberry Lemonade

The perfect summer drink, made easier and healthier! Tangy lemon juice is paired with ripe strawberries and naturally sweetened with agave nectar, creating the perfect mix of tart and sweet. This strawberry lemonade is bright, crisp, and has a stunning pink hue! In just 3 ingredients, 10 minutes, and a blender, you’ll have a refreshing summer treat. Let us guide you through the steps.
Top Natural Sweeteners for Strawberry Lemonade
To achieve the perfect flavor while keeping this strawberry lemonade naturally sweet, we experimented with several options: agave, honey, maple syrup, coconut sugar, and stevia. One sweetener stood out as the clear favorite: agave! It mixed effortlessly and beautifully complemented the strawberry and lemon notes without overpowering them.
Not Quite the Best?
Honey tended to stick to the bottom of the blender, making it a bit tricky to blend, though it added a lovely floral sweetness.
Maple syrup imparted a distinct maple-strawberry flavor, which wasn’t our favorite, but it could pair well with bourbon for a unique twist.
Coconut sugar was a bit too flavorful and reminded us of brown sugar, which didn’t quite fit the vibe we were going for.
Stevia can work if you’re accustomed to its aftertaste, but it’s easy to overdo it while trying to balance the tartness of the lemons.
How to Make Strawberry Lemonade
This recipe is super simple! Just blend fresh strawberries with water, agave, and a generous splash of lemon juice, and it’s ready to enjoy!
- Using this “dump and blend” method, the lemonade will have a frothy top (which we think is great). But if you’re not a fan of froth, you can blend the strawberries and agave with just a little water, then stir them into the lemon juice and the rest of the water. We’ve added a note at the end of the recipe for this variation.
- For a smoother texture, you can strain the lemonade through a fine mesh sieve to remove any strawberry seeds.
- Serve it however you like: at room temperature, chilled, or over ice!
We hope you absolutely LOVE this homemade strawberry lemonade! It’s:
- Refreshing
- Citrusy
- Infused with strawberries
- Tart and sweet
- Quick & easy
- And perfect for summer!
It’s the ultimate drink for hot days, berry season, and picnics!